Part 1: The hardware
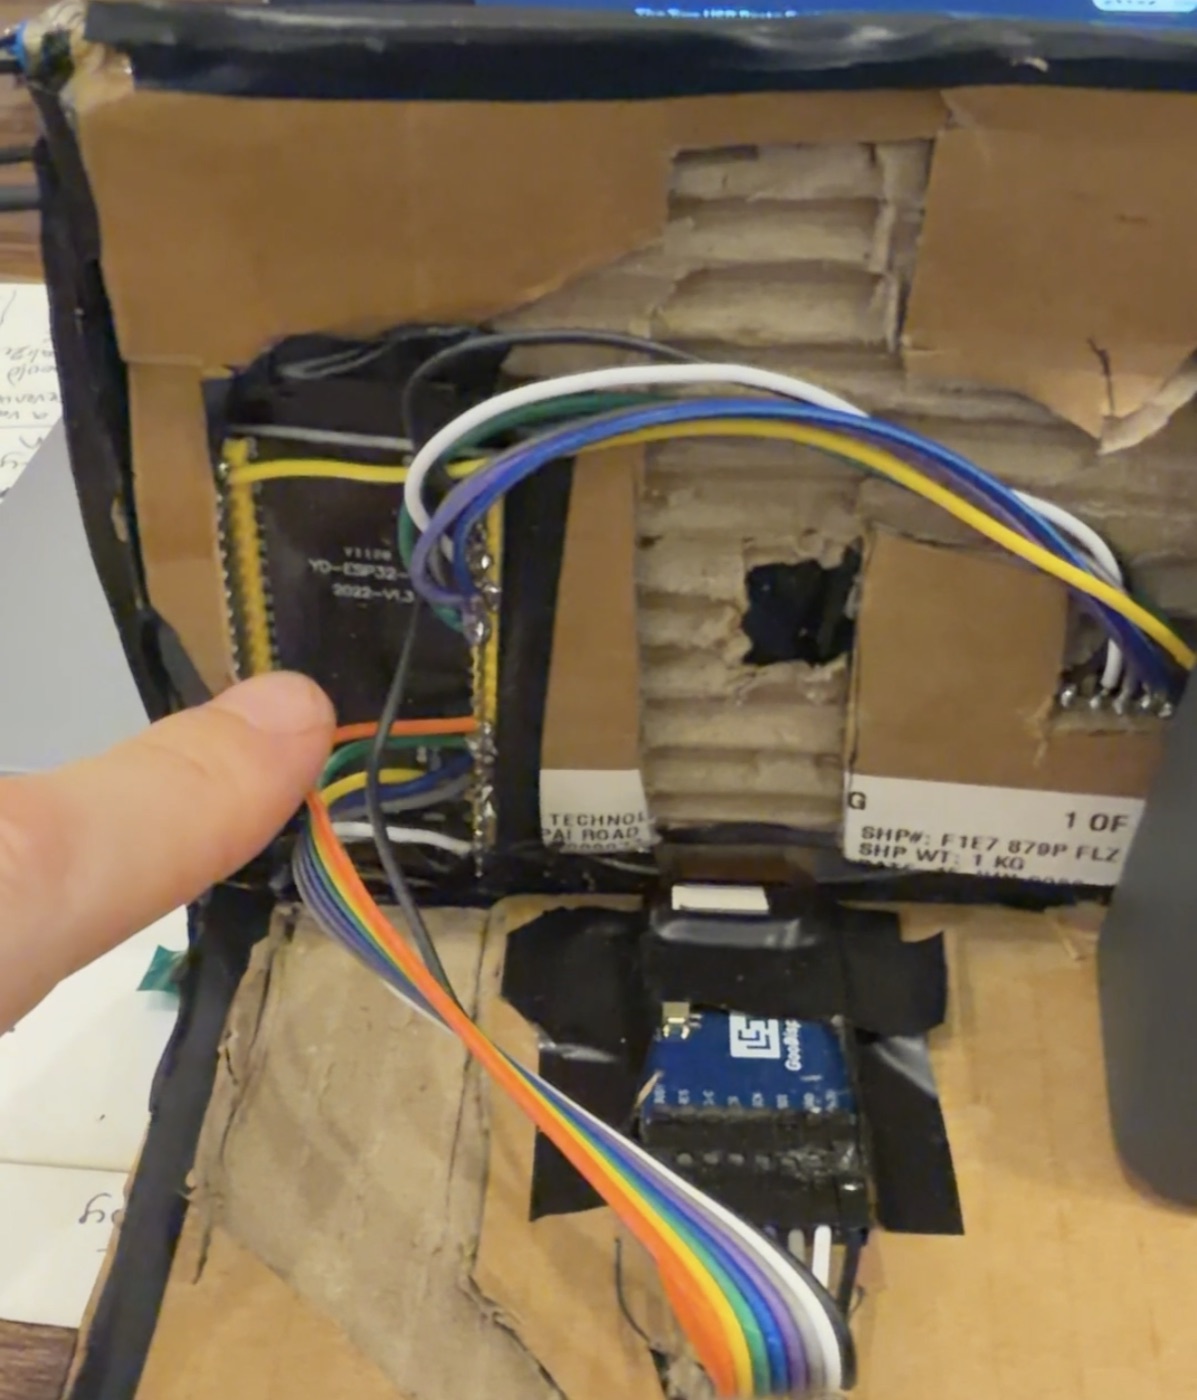
You need four things: an ESP32-S3 dev board, an e-paper panel with its adapter board, a five-way button module, and a way to power it. Total cost lands between $35 and $60 depending on the panel you pick. The ESP32-S3 is the right microcontroller for this because it has WiFi built in, enough flash to store a few books, and a hardware SPI bus that drives the panel at full speed. Buy a board with 8 MB or 16 MB of flash if you can; the 4 MB boards work but leave little room for text. For the buttons, any five-way navigation module (up, down, left, right, center click) from the usual hobby suppliers will do, wired with one common leg to ground and five signal legs to free GPIO pins. Add a BME280 breakout if you want temperature and humidity on the status line; it is optional and costs a couple of dollars.
| Part | What to buy | Price | Notes |
|---|---|---|---|
| Microcontroller | ESP32-S3 dev board, 8 or 16 MB flash | $6 to $12 | Any generic S3 board with USB-C. Dual USB-C boards make flashing and monitoring easier. |
| Display | Black and white e-paper, 5.7 to 7.5 inch, SPI, partial refresh | $25 to $45 with adapter | Buy the panel and its adapter board as a kit. See the panel section below. |
| Buttons | Five-way navigation switch module | $1 | Five signals plus one common ground. |
| Capacitors | 470 uF electrolytic + 100 nF ceramic | under $1 | Across the adapter's VCC and GND. Not optional. |
| Power | USB only, 3x AA + Schottky diode, or a small lithium cell with charger board | $0 to $8 | Pick one. Details below. |
| Optional | BME280 breakout | $2 to $4 | Temperature and humidity on the status line. |
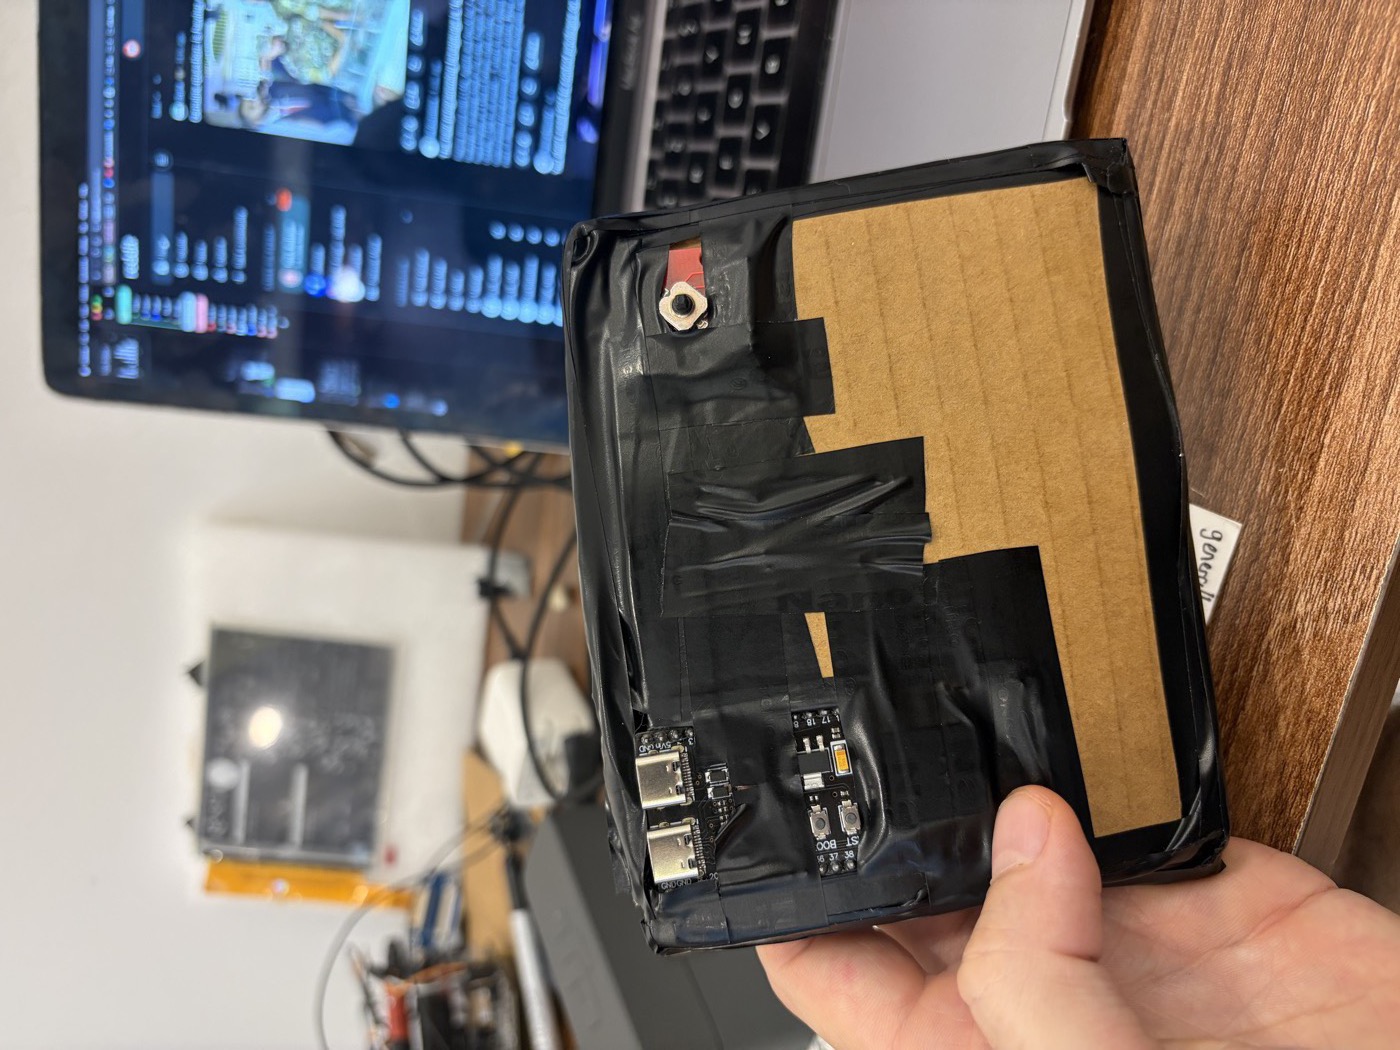
| Case | Two pieces of cardboard and tape, a 3D print, or a cheap CNC order | $0 to $15 | Cardboard is what you see in the photos. |
Choosing the e-ink panel
Ordering the display is where people get lost, so here are the variables that matter. Go to waveshare.com (or good-display.com, whose panels Waveshare resells) and filter on these:
- Size. 5.7 to 7.5 inches reads like a paperback. 4.2 inches is pocketable but cramped for a full page of text.
- Resolution. Aim for 800x480 or better. Below that, small text looks jagged and you lose a column of characters per line.
- Color. Plain black and white refreshes fastest. The three and four color panels take 10 to 20 seconds per page and are a poor fit for reading.
- Interface. You want SPI, which every hobby panel uses. Skip parallel panels; they need a dedicated controller board.
- Partial refresh. The one that decides whether page turns flash white for two seconds or update quietly in a few hundred milliseconds. Look for "partial refresh" or "fast refresh" on the product page.
The panel ships as bare glass with a flat ribbon cable, so you also need the matching adapter board (Waveshare calls it a driver HAT, Good Display calls it DESPI). Buy the panel and adapter together as a kit and confirm the adapter runs at 3.3 V. The panel in the photos is a Good Display GDEH0576T81, 5.76 inch, 920x680, black and white, on a DESPI-C02 adapter, and it supports fast partial refresh.
Power, with or without a battery
Power is flexible because e-paper holds its image with no power at all, and the position in the book gets saved to flash on every page turn. That means the simplest build has no battery: plug a USB cable in, read, unplug, and the last page stays on the glass. If you want it portable, three AA cells in series (4.5 V) fed through a Schottky diode into the board's 5 V pin works well; the diode drops about 0.3 V and stops the board's USB supply from pushing current back into the cells when you plug in to reflash. A small lithium cell (500 to 1000 mAh) with a $2 charger and protection board is the tidier option and gives weeks of use per charge.
Firmware and case
For the firmware, ask Claude to design it. Give it the exact panel part number, the adapter model, your board, and the pin map, and ask for a PlatformIO project using the GxEPD2 library with partial refresh, a five-button menu, a text paginator that runs on your computer and uploads pre-wrapped pages to the board's filesystem, and a WiFi sync step that downloads a text file from a URL. Ask for soldering instructions in the same conversation and it will walk you through the pin map one wire at a time. The case can be as simple as two pieces of cardboard with a window cut for the panel and a hole for the buttons, which is what mine is. A 3D printed shell is an evening of work if you have a printer, and if you do not, a two-piece design ordered from a cheap online CNC or print service runs about $15.
Part 2: The automated news brief
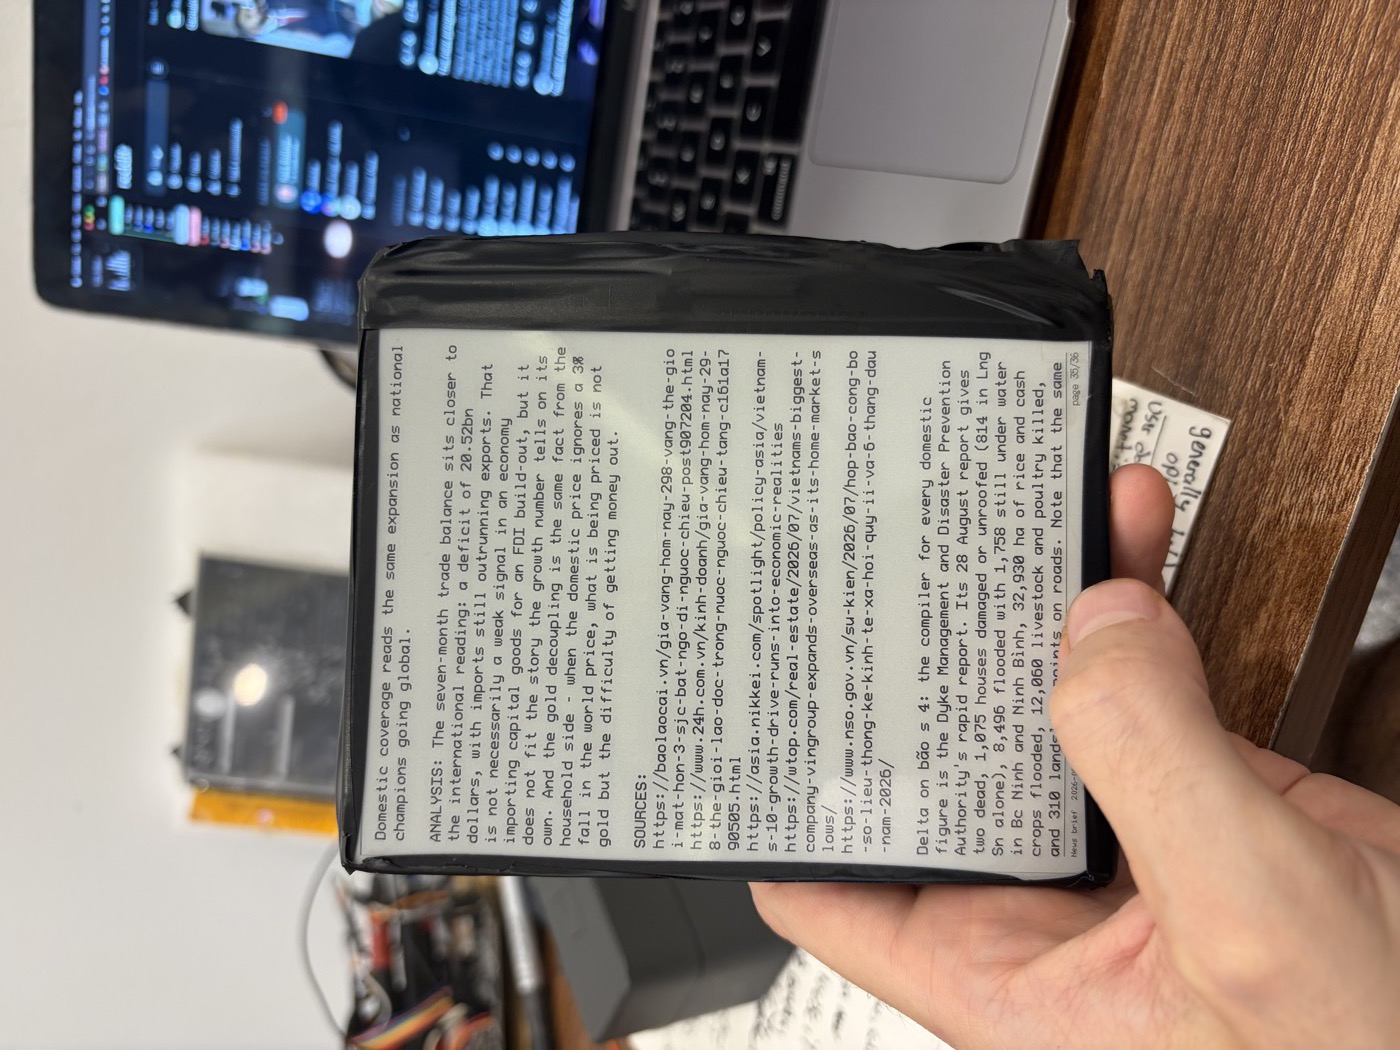
The reader gets interesting once it fetches content on its own. The setup has three pieces: a scheduled agent that writes the brief, a small server that stores the latest copy, and the device pulling it over WiFi.
Claude Code routines handle the first piece. A routine is a Claude Code session that runs on a schedule in the cloud; you give it a prompt such as "research these six topics, write a 1500 word brief in plain text with short paragraphs, no markdown, and upload it to this endpoint," pick a cron schedule (mine runs three mornings a week), and give it network access plus an upload token stored as an environment variable. It runs unattended and posts the finished text.
The server can be almost anything that accepts an HTTP POST and serves a GET. I used a Cloudflare Worker, which is free at this volume and has no machine to maintain: one route accepts the upload behind a bearer token and writes the text to KV storage, the other serves the latest file behind a read token. A Raspberry Pi running a twenty-line Flask app on your home network does the same job if you would rather keep everything local. The device side is a single function: on boot or on a button press, join WiFi, GET the URL, write the text to flash, paginate, and show page one. Ask Claude to write both halves and to keep the brief format fixed at plain text with a known column width so the device never has to do layout work.
Part 3: The Game Boy server and the Pokemon companion screen
This is the part the video is about. The reader hosts NES and Game Boy ROMs and serves a browser emulator to your phone over its own WiFi, keeps the saves so a laptop and a phone can share one game, and while Pokemon Red or Blue runs the e-ink turns into a live companion screen drawn with the game's own font, tiles and sprites: the Kanto map with your position, the party with HP bars, badges, money, the bag with Mart prices, the route you are on with its wild encounters and hidden items, and a battle view that scores your moves against the enemy's types. The firmware, the browser page and the design docs are all in the public repo at github.com/AllanBinder/ereader (Apache 2.0). It ships no ROMs and no game assets; you bring your own dump and build the asset pack yourself from the game's disassembly.
pio run -e esp32s3 -t upload. The emulator page is linked into the firmware image, so that one command is the whole install. Pins are in include/pins.h if your wiring differs from the guide.third_party/pokered and run python3 tools/pokered_pack.py. It reads the font, town map, tilesets, sprites, wild tables and item lists straight out of the disassembly and writes build_pack/pokered.pack, about 240 KB. Pillow makes it faster; it works without it.ereader-games, password ereader1) or, if the reader knows your home WiFi from Part 2, open http://ereader.local/ on the same network. Upload the pack and your ROM through the page's file picker, tap the ROM, play.The reader never emulates anything. An e-paper panel cannot draw sixty frames a second and the ESP32 has no memory to spare, so the emulator (jsnes for NES, WasmBoy for Game Boy and Game Boy Color) runs in the phone's browser and the reader only stores and serves files. What makes the companion screen possible is that the page can read the emulator's memory. Once a second it takes the Game Boy's 8 KB of work RAM and posts it to the reader, and the firmware decodes it with addresses taken from the pokered disassembly: the party lives at one address, money at another, the current map and your step coordinates at two more. Pokemon Red never wrote any of this for a second screen; it just keeps its whole world in 8 KB, and the disassembly community mapped every byte of it. The panel redraws only when something you can see has changed, a partial refresh in about half a second, with a full refresh once a minute to keep the image clean.
On the reader the silkscreen right button pages from Home to Inventory and back, the left one goes the other way, up toggles the terrain view of the map you are standing on, and center leaves the games server. A battle takes the screen on its own and hands it back when the fight ends. On the phone the pad works on touch, and on a laptop the arrows or WASD move, X or E is A, Z or R is B, Enter is Start, Shift is Select. The speed button runs the game at 2x or 4x for grinding. The page saves the cartridge RAM to the reader whenever it changes, writes an autosave every minute, and offers Continue the next time any device opens that ROM.
docs/companion-dashboard-game-candidates-2026-09-13.md, hand the Pokemon files to a coding agent as the worked example, and ship a generator, never the assets or a ROM. I would love to see a Crystal or a Link's Awakening screen; open an issue or send a pull request.
Part 4: Where this could go
The part I keep thinking about is multiplayer. The games server already proves the shape: an ESP32 can run as a WiFi access point, so the reader broadcasts its own network and serves a web page to anyone who joins. Nobody installs an app: players scan a QR code on the e-paper, their phone opens a page served by the device, and the panel becomes a shared board on the table that everyone can see while phones hold the private hands. That covers a whole class of tabletop games (trivia, drafting, hidden role, bidding, word games) and the panel is a perfect scoreboard because it stays readable in daylight and holds the last state if someone knocks the power out. The same hardware could host a shared reading group where the device shows one page and each phone gets a vote on what happens next, or a quiz night where the question is on the glass and answers arrive over the local network.
I would like this to be an open source platform rather than one person's project. If you build a reader from this guide, or if you want to help define a small game API (device serves the board, phones post moves over HTTP, everything stays on the local network), email me or reply wherever you found the video. Ideas for games, case designs, panel choices, and power setups are all welcome. Pictures of your build are the best contribution of all.